DIY - Desk & Dresser
Sometimes you see an item and think - I can TOTALLY redo that - and it works out great. Other times, you get into a project and suddenly you think I should not have bid on this, its not worth my time. If you think that the latter is going to be you, persevere! I convinced sweet husband that our daughter could really use these in her room...
In hindsight - these were just ugly...
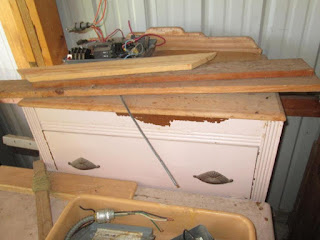
We purchased them at an online auction and went to pick them up. As I walk up to them it suddenly dawns on me that this is a dresser and a vanity...not a desk. (the mirror had no glass, and was in bad shape but hadn't been pictured). However L's room is small and a small vanity would work as a desk. I should have taken more pictures as I tore out the mouse droppings and nests that were in the desk drawers. Thankfully my husband stripped off the layers of pink and brown paint. (I can't tell you how much I hate paint stripper).
Those grooves were fun...in a not at all fun way. . .
The paint was actually so old it was coming off with a putty knife in some spots. He sanded and sanded both pieces - I'm suddenly realizing he did more work on this then me...how did that happen? Finally he carried them to our basement for me to paint. . . .
Where I stared at them...and ignored them.
I finally went to our local lumberyard and picked up some Rustolium Chalk paint - love this stuff ya'll. It is on the pricer side for paint, so I primed the pieces with Zinnser BullsEye 1-2-3 Primer (Link) love this stuff, and then put on a coat of the chalk paint. If you've never used chalk paint, its not your glossy looking finish. Its a very soft, matte finish, but I love it! You brush it on very gently, but the end result is great. SO I painted the drawers, and the base of both units but not the tops.
If you read a can of stain it mentions using a wood conditioner, but being one of those that doesn't need something they are just trying to "sell" me, I have never bought any, never used it, etc etc. Occasionally hindsight is 20/20...or 30/30 - when working with really old, really dried out wood, I'm thinking the conditioner is probably what I needed. So maybe they weren't just trying to sell me something...maybe..Minwax (heard of them - they've done this for a while) knows what their talking about, yeesh. BUT my way did work, my end result was probably not nearly what it could have been. But had sunk a mere $18 into the set, along with paint and stain, so I am still SUPER pleased with the results.
So I mentioned I hate paint stripper, I also have an aversion to lacquer. Ya'll that stuff STINKS and you have to use mineral spirits to clean up, I just avoid it if possible. Some situations you just have to use it, but I try and find alternative methods if possible. *Trust me my husband is reading this shaking his head because he also doesn't understand the aversion, no worries I can take it* SO I decided to go with a wax that Minwax puts out. Its pretty great stuff, however it also smells alot....but to me its way easier to work with. Rub on a layer, wait 15 min and buff it off. (if you're a fitbit wearer, use your left arm, you will get some steppage!) After you buff it, let it sit for a few hours and the wax hardens and leaves a gorgeous finish. I LOVE this stuff.
Finally a finished product! I was so excited to get these babies moved up to L's room -
and I think they look pretty darn good as well!

Look at this top! The wax gave it a gorgeous shine, and it is rock hard! I probably wouldn't use this for my dining room table, but for pieces like this I think it works amazingly! DIY complete!


Comments
Post a Comment